Showing posts with label DIY. Show all posts

Wednesday, September 5, 2012

C A M O.

The new trend that has been popping up across a lot of streetstyle blogs has been oversized Camo jackets. Instead of keeping you warm and out of sight in the wild, these jackets have a hitting all the biggest editors and bloggers from around the world! A big change from what these jackets were meant for i.e. hunting. I much prefer this function as a statement jacket! 


(Source: stockholm streetstyle, tumblr, honestlywtf, streetfsn, the satoralist, asos) 

As you can see, everyone has there own take on the trend. From the ones that keep it simple with a black accessories and black clothing, others have opted for more adventurous options such as clashing prints like leopard, mesh and bright colours. There's literally no wrong way of rocking this trend. Some have even jazzed up these jackets with leather sleeves and studs (everywhere). 

It's a DIY project waiting to happen! For more inspiration check these jackets out! 

Ahhh just found a cheap ass secondhand camo jacket while trolling ebay. Time to get my DIY on. Seriously it's so easy! Or if you are too lazy and you're not so good with arts and crafts there are plenty of options out there. Check out ASOS and Topshop. They have some great camo finds :) 

Hopefully I get one soon and I'll show you all how I pair this awesome new trend! 


x

Ann 

Tuesday, June 19, 2012

T W O T O N E # 2


This has got to be my second most worn outfit this winter. This deconstructed blazer makes layering so effortless in the mornings when I look at my wardrobe and think "I have NOTHING TO WEAR!"And as usual I'm keeping to my rule of wearing black and white with ONE colour (besides the green necklace). Add a beanie to keep your head warm and you're ready to conquer Sydney's freezing temperamental weather. Originally I was going to wear my Topshop ankle boots but instead I opted for my flatforms.


I couldn't resist the sunset over my front garden so there's a bit of a variation in my photos. I hope you guys like my sister's pro photography. My tripod is proving to be a lot harder to use :(. Below you'll find each layer of my outfit. As you can see I've ditched the tradition blazer and created by own by teaming a jacket and a deconstructed blazer or vest to recreate a new blazer. One that is not only warmer and thicker but much more interesting. Plus instead of forking out hundreds of dollars like this Helmut Lang beauty below you can simply turn an old black blazer that you no longer wear take the sleeves off and WHA LA! You have a deconstructed blazer to team with any of your existing coloured jackets to create different types of blazers! I don't think I've had this much fun layering for winter in quite some time. 

(source: Helmut Lang)

OR if you're broke like me you can find something similar on General Pants. They're having a sale on a blazer that's similar for only $55! 


Oh and don't you love my green beaded necklace, it was given to me by boyfriend's aunt when she went to Costa Rica! AND IT'S HAND MADE! It's probably not that exciting to everyone else but in real life it's so exquisite and I love hand made jewellery, it just makes things so much more special knowing that someone made it with their bare hands rather than the mass produced 'stuff' you find at Diva. Hmmm. 

(Just Jeans Leather Jacket, Neon Hart Deconstructed Blazer, Handmade Green Necklace from Costa Rica, Burgundy Lee Jeans, Alice in the eve T-shirt, Agent Ninety Nine Beanie, Therapy Flatforms, Mooloola Lace Bodice)


Also if you're confused about how to make the deconstructed blazer, A Pair & A Spare DIY blog has a really good tutorial on how to make it! Here are the steps:

You need:
- A thrifted blazer or old blazer
- Seam ripper (aka quick unpick)
- Scissors
- Needle and thread (or sewing machine)
- Iron

How to:
1. Turn your blazer inside out and use the seam ripper to separate the arm from the shoulder along the seam, making sure to keep the existing seam allowance.
2. Snip away any stray threads.
3. Using your needle and thread (alternatively use a sewing machine like I did), stitch the edge of the shoulder seam under to create the hem for the arm.
4. Iron well so that the shoulders sit perfectly.


That's what it should end up looking like! :) 

HAVE FUN DIYING :)


x

Ann

Monday, January 16, 2012

M U S I N G.


Just thought I'd share this with you all :). New DIY project anyone?

Love
Ann


Source: tumblr

Monday, December 12, 2011

C O L L A R S.


(Tumblr, Google, A pair & a spare, birdsofafeatherflocktogether, chicmuse, honestlywtf, tumblr)

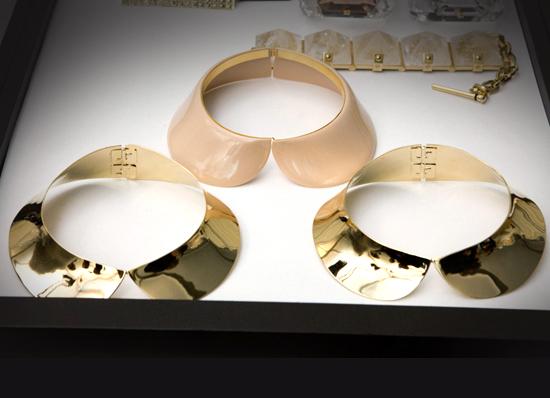
I love collars. Simple fact. I love them! Just something about the preppy look that I love and I can't seem to get over! It's also the most fun for DIY projects! Collars tips + swallows on collars... sigh amazeballs!

Anyways I'll post up pics of my DIY successes with these collars as inspiration! :)

Love
Ann

Thursday, July 14, 2011

C E L E S T I A L.


DIY Celestial Wedge


Celestial Blazer - Nanda


Cosmic Lita - Jeffrey Campbell


Christopher Kane Pieces


Rainbow Galaxy Leggings - Black Milk

Lately, celestial or cosmic patterns have been surfacing and I'm not yet convinced that it will look good on me. However, it is becoming increasingly popular with the hipster crowd :). It's definitely funky and in your face but I'm not quite sure I want to look like some parts of my body look like they're in outer space. But seeing them in real life on somebody would definitely have me staring at them (in a good way of course). So maybe I might end up doing a DIY project on my black wedges like the one above. It's definitely something I want to try! 

Love
Ann